We all have videos that are low quality that we would love to see in HD or 4K quality where the realms of traditional upscaling only goes so far.
That all changes with the video magic that is Video Ai here is how I used Video Ai to pull of an April Fools prank convincing people what they were watching was 4k video from a 35mm scan.
Garbage in umm...
After recently watching a YouTube video on Linus Tech tips about how they used Topaz Labs Video Enhance Ai to convert their first video from 360P to 4K and a 720P video to 4K I was intrigued.
I first downloaded a trial version which you can do for free and it lasts 30 days with the only limitation is it puts a watermark on the output.
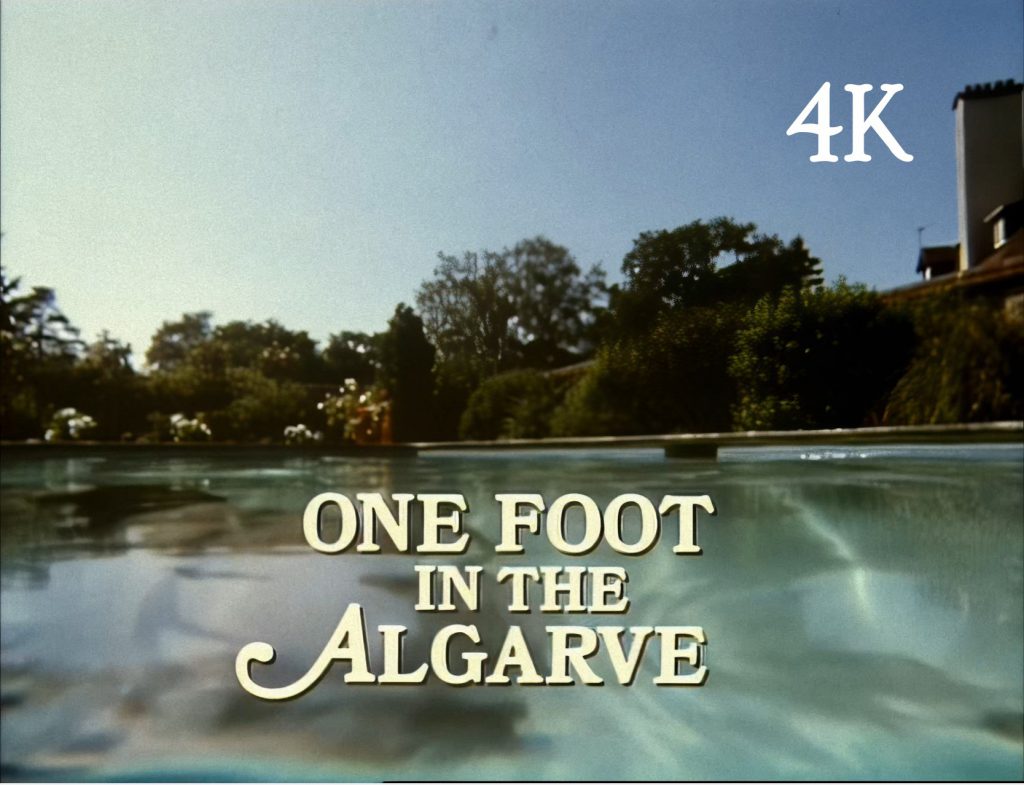
I did not know what to expect but I started with the opening scene of One Foot in the Algarve I was impressed and this was just using some pre-set’s without properly fine tuning or really looking at the instructions.
After a week of being impressed after chucking loads of different videos at it I bought it which is quite rare for me as I’m normally quite tight.
the software costs $199 but after trying all the vouchers i could find they all took off $30 it was in the Black Friday sales 2021 down to $99! You can use the software for life but only upgrade for a year and then to upgrade after its another $99 of course with it being AI it will be improving all the time.
Now when dealing with video a couple of sayings come to mind and you may have heard of them one is ‘Garbage in Garbage out’ which means if you use low quality video i.e poorly encoded and or low resolution then the output will be garbage and the other saying is ‘you cant polish a turd’ well no need to expain that one!
Essentially if you have a low quality and or low resolution video and try to watch it back on say a large 4k TV that may of us have these days well its not going to look as great as it did on the 21″ CRT it was originally intended to be seen on or a small phone screen.
Upscaling and deinterlacing (for interlaced videos) can be hit and miss with some devices and or software doing decent jobs but others are just rubbish and even with the best ones getting say an SD video to look like native 4K is not likely.
During my testing of Topaz Video Enhance Ai has made it possible to have garbage in and a gold polished turd out!
How it works
The software works its magic by using Artificial Intelligence where their software has been fed loads of compressed and uncompressed versions of videos to learn how to restore videos and get rid of compression artefacts and noise.
Most traditional upscales when enlarging a low res video to higher resolutions do so by enlarging and sharpening the pixels but also magnify the noise and compression blackness and mosquito noise in the video.
To use the software you will need a pretty powerful machine with a decent graphics card.
My PC has an i9-9900K 32GB 3200mHz Ram and a GTX 2070 Super graphics card and depending on what your converting it can be between 0.33 seconds per frame to 2+seconds per frame.
I worked out to do the whole 90mins of One Foot in the Algarve would take 11-12 hours!
This is where doing the trial is perfect for testing how well your system can run it.
When you open the software the interface is simple enough you browse and open your desired source video it displays the source resolution and framerate.
On the left hand side is where you choose the pre-set and by default it will recommend you some based on the source video quality and you can set the quality and type manually.
You can set the desired output size if you want to add grain and the output video format and if you wish to keep the audio.
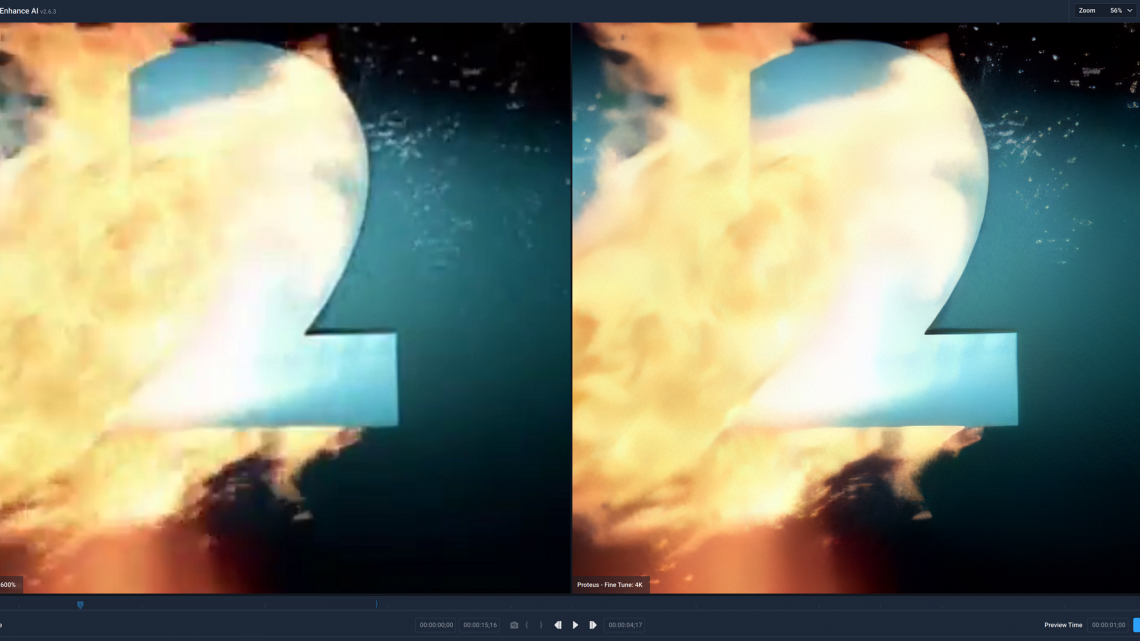
There is no real time preview the window what you see on the view in the screen shot above is just the source video as is to preview what you have chosen you need to hit the Preview button:
On the preview screen you have the original on the left and the rendered AI output on the right it does about 1-2 seconds which once rendered loops and looks like a GIF.
You can pause and go frame by frame and zoom in and out which is really handy and as you will see from the above screen shots the difference is amazing!
Going back to the main screen you can compare upto 4 AI models side by side which is really handy when deciding which one to use.
I have been finding the Poteus-Fine Tune model the best especially where real humans are involved as the other pre sets can go a bit over the top and make it look fake.
Using the fine tune model allows you to manually tweak the settings to get the video looking just right, it does have a lighting bot icon which when pressed sets the settings automatically based on the current position of the video analysing the scene to give what it believes is the best results and in most cases it is spot on.
Adding grain is used to give it a more natural feel again changing the values and previewing is a good idea or in some of my cases i decided to turn this off and add it in on DaVinci Resolve during colour grading in there.
the Video format options are .MOV ProRes 422HQ, H.264, .jpg,.png,.tif,.tiff the later being image files where each video frame is saved as an individual image.
The video output sizes are huge especially when doing 4K and using ProRes the opening scene of One foot in the Algarve came in at a whopping 10GB!
Night and Day
So far I have tried the software on a variety of sources inlcuding some DVD’s both progressive and interlaced and also 240,360P videos from the web, VHS and HD sources.
It does animation really good for example I was able to upscale an American Dad NTSC DVD from Season 1 to 4K and it looked fantastic just as good as the HD episodes.
The Snowman again looked just as good as The Snowman and the Snowdog does.
I have been testing it on some of my favourite Idents from the BBC 2 1991-2001 era and even on ones where the source is low qulaity 360P video the results are outstanding.
The featured image which shows the BBC 2 Catalyst ident with the 360P source on the left and the 4K Ai upscale on the right it is literally night and day.
The software is not perfect it can produce some funnies where it does not get something quite right this can lead to things looking odd like faces that look cartoon like.
I have run some tests on The Darling Buds of May using the DVD source enhanced to 4K and comparing with the actual HD episodes and I have to say its pretty spot on!
I was testing it out on S1E1 of The Royle Family and it made it look like Jim had waxed his Arm!
This is why its important not to push it too far and to use the manual setting to tweak if the pre sets are giving odd results.
In Linus Tech tips video they pushed it too far hence the less than ideal results they got now had they not been as ambitious with their 240/360P video and pushed it to say HD or just full SD and used the fine tune settings like i have they would have got better results.
They used the pre-set that also changed the frame rate which works well but you don’t get the flexibility.
One of the things i have been testing is some of the BBC VT Xmas taps that for the 90’s ones I only have really poor quality 360P versions that are blocky as hell!
he screen shot above shows the original on the left and the 4k AI on the right.
Now certain shots of this video in 4k and HD look really good but others look a bit dodgy and I found lowering the output video resolution helped make it look more realistic and in reality pushing this low video to 4K is a step too far and indeed just stick to a slight upscale to full SD 720*576 produced better results and the output was improved over the source as it removed all the compression issues.
What I found amazing is for all the videos ive tested not only does it increase the resolution and bring back details and get rid of compression and noise it also to me made the colours look better and things shined more overall the results are really impressive from this software.
The perfect April Fools!
After fine tuning the parameters on the One Foot In The Algarve opening scene and really happy with the results I opted to not use the Topaz Video AI grain option and rendered as a Pro Res 4K video.
I then pulled the rendered video into DaVinci Resolve to do a tad colour grading including adding grain at this point and replacing the audio with the origional audio form the DVD.
One thing to bear in mind the audio from Topaz program is just low quality AAC so you will want to use the original audio track especially if your source has a surround sound track.
Once i had rendered the video from Resolve I watched it on the TV for the first time and the result is amazing it really does look like native 4K like I had gone and got the original 35mm film negatives and scanned them in at 4K!
I then sent the video to a few of my friends on Twitter people that know about video quality and are not easily fooled this included @OneFootinthePod , One Foot in the Podcast who knows One Foot in the Grave inside out and the feedback was
“Wow!. That’s amazing quality. Surreal too.”
Then I had an idea for an April fools prank by uploading this clip to YouTube and making out that it was part of a brand new BluRay remaster of the feature length special and the Blu Ray would be released next year for its 30th Anniversary.
With the help of One Foot in the Podcast I think we pulled it off!
Many thanks to One Foot in the Podcast for your help in pulling this off.
Who knows maybe it will happen we have had the Only Fools Blu Ray release the other year and that was only part shot on film for some of the specials! you can see a video review I did of that here
You can see some more of my 4k AI enhanced videos on my YouTube channel
Custom menu section
This is off canvas menu widget area. To enable it add some widgets into Appearance – Widgets – Menu Section, and go to Customizer – Main menu to set the icon position.